Common Problems with Roofing Coil Nailers and How to Fix Them

In daily operations, we often use the roofing coil nailer, because its operation is relatively simple, but even if it is a good product, there will be some failures when we use it, which requires us to repair. This blog will give you an introduction to some methods of repairing the failure of the roofing coil nailer.


Air Roofing Coil Nailer


1. Slow clamping action or insufficient clamping stroke of the coil nailer: the bolt is loose, the inner plate of the front buckle trigger is worn. At this time, you can tighten the bolt, paying attention to the correct position of the front buckle. You can also replace the front buckle or the inner plate of the trigger. After completing the above actions, test its function, if the stroke is too short, fine-tune the front buckle shaft upward, if the movement is slow, fine-tune the front buckle shaft downward;


2. The exhaust port air leakage: switch valve ring or switch seat ring damaged or piston ring damaged. Replace the ring.


3. Air leakage at the piston rod: the bottom ring of the main body is damaged. The ring should be replaced.


4. Air leakage at trigger: switch valve ring or switch seat ring is damaged. Replace the ring.


5. The transmission ring is loose and cannot be located: plastic steel bars and transmission springs are inelastic. Remove the trigger assembly, and reinstall the spring tip or replace the plastic steel bar and transmission spring.
Step-by-Step Guide to Using a Roofing Coil Nailer

This blog provides a detailed guide for safely and effectively using a roofing coil nailer. It starts with essential safety tips, emphasizing the importance of wearing appropriate personal protective equipment, such as safety glasses and ear protection.


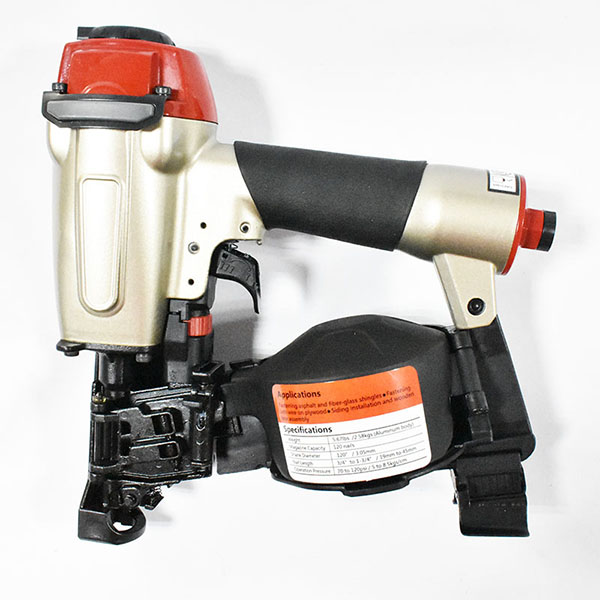
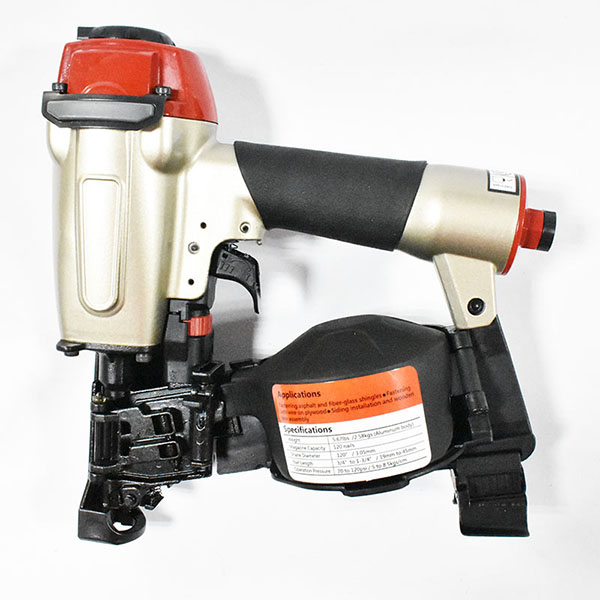
Roofing Nailer Gun AirClaw CRN45A Roof Coil Nail Gun

1.  Before operation

(1) Wear safety glasses or goggles

(2) Do not connect the air supply

(3) Inspect screw tightness

(4) Check operation of the contact arm & trigger if moving smoothly

(5) Connect the air supply

(6) Check the air-leakage.(the tool must not have the air-leakage.)

(7) Hold the tool with finger-off the trigger, then push the contact arm against the work-pieces.(the tool must not operate.)

(8) Hold the tool with contact arm free from work-piece and pull the trigger.(the tool must not operate.)


2.  Operation

Keep hands and body away from the discharge outlet when driving the fasteners because of dangerous of hitting the hands or body by mistake.


Nail loading

(1) Disconnect the air hose.

(2) Press LATCH to open DOOR, then open MAGAZINE COVER.

(3) Adjust the height of NAIL SUPPORT according to nails length.

(4) Fix the first nail in the groove on FEED PAWL.

(5) Close MAGAZINE COVER, close DOOR.

(6) Connect the air hose.


Test operation

(1) Adjust the air pressure at 70psi. (5 bar) and connect the air supply.

(2) Without touching the trigger, depress the contact arm against the work-piece. Pull the trigger.(the tool must fire the fastener.)

(3) With the tool off the work-piece, pull the trigger. Then depress the contact arm against the work-piece.(the tool must fire the fastener.)

(4) Adjust the air pressure as much as the lowest possible according to the diameters and length of fastener and the hardness of work-piece.